Apparently, I’m quite good at taking a hiatus on a cliffhanger of a post. I left off last time talking about customizing a Hexhog STL with runes to make a Warmahordes objective marker and all the little pieces of software and techniques I used to make that happen. But, designing and printing the tile was only half of the equation; the other half is painting it up so that it looks nice.
First, it’s worth noting, I’m not a good painter, so you’re welcome to take this entire process with a grain of salt. I did it because it was very non-technical and because it worked for me, in that what I finished with looked table-worthy. Caveats out of the way, let’s go.
I don’t have any pictures of the newly printed tile, but, I do have pictures of the primed terrain, so let’s start there:
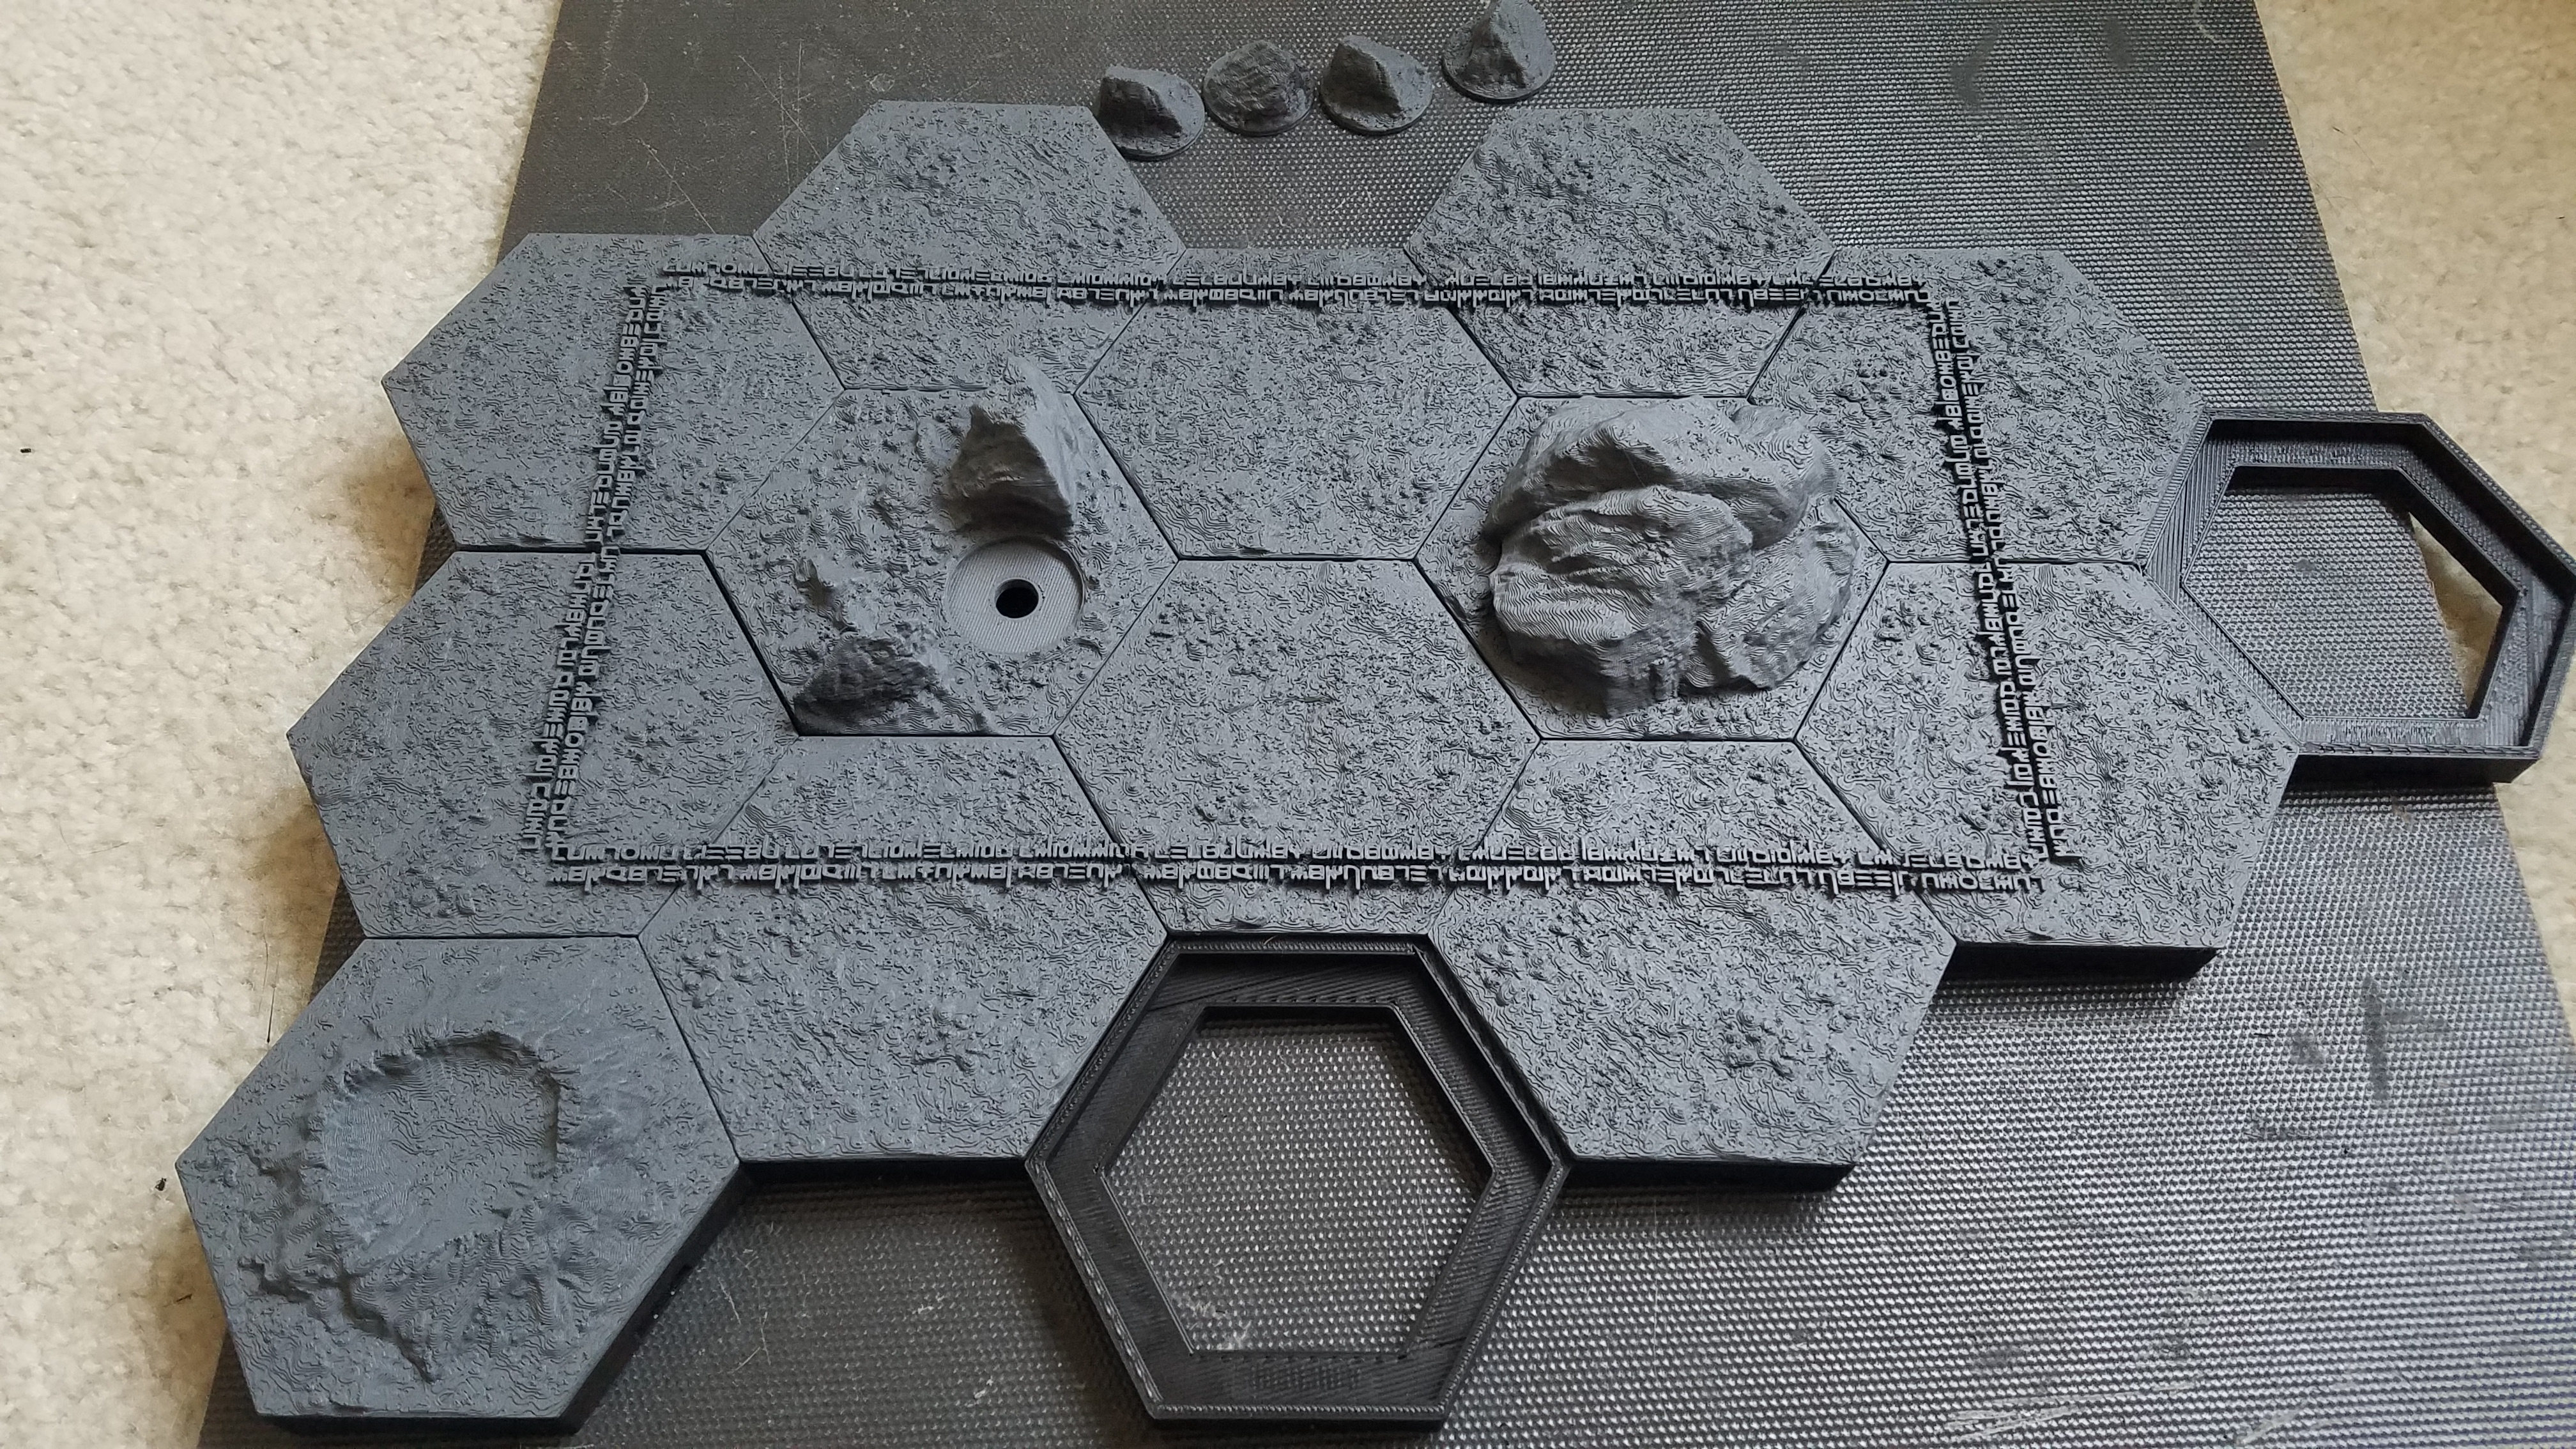
Nothing fancy here – but it’s worth remembering to prime everything. As you can see, you can still see layer lines in this picture – I didn’t use automotive primer or a layer of mod-podge for this project as I’ll be doing a few different layers instead.
Next, I did a colored base layer. There is not a lot of detail here, just trying to add a bit of color underneath what will have snow on top. The two things that I did do intentionally were to ensure there was green all the way around the runes (rather than brown or grey) – this is going to show through a bit more, and I wanted to have it be more green than brown. Additionally, I painted the runes white in this step to help have the red stick and pop a bit more.

In preparation for the snow layer, I taped off the runes with scotch tape. The goal here was two-fold: first, I didn’t want to get the textured paint on the runes to keep them nice and clear. Second, I wanted to border the runes with less snow to imply that they were a bit warmer than the snowy countryside. After that, I put down a layer of Rust-Oleum “Bleached Stone” textured spray paint, which is sort of an easy way to have a globby snow effect. The spray paint itself isn’t perfectly white, so I then did a light layer of plain white spray paint which dusted the whole thing with a layer of white. After the layer of white dried, I removed the tape and did another light layer of white spray paint, giving an overall medium-depth snow effect:

I like this because it adds some white texture to the terrain, making it a bit of extra snow-sized lumps, but still left enough of the under-coat showing through to give an impression of the grass/mud underneath.
Finally, I did detail color. The runes I did in Christmas Red (my favorite bright red for Khador), while the cliffs and exposed rock I did in black for a nice contrast. As a highlight, I did baby blue highlights on the cliffs to transition between the snow and the exposed rock. For the runes, I did a slight mix of metallic white and red for just the top of the runes for a pink-glowy color on the top:
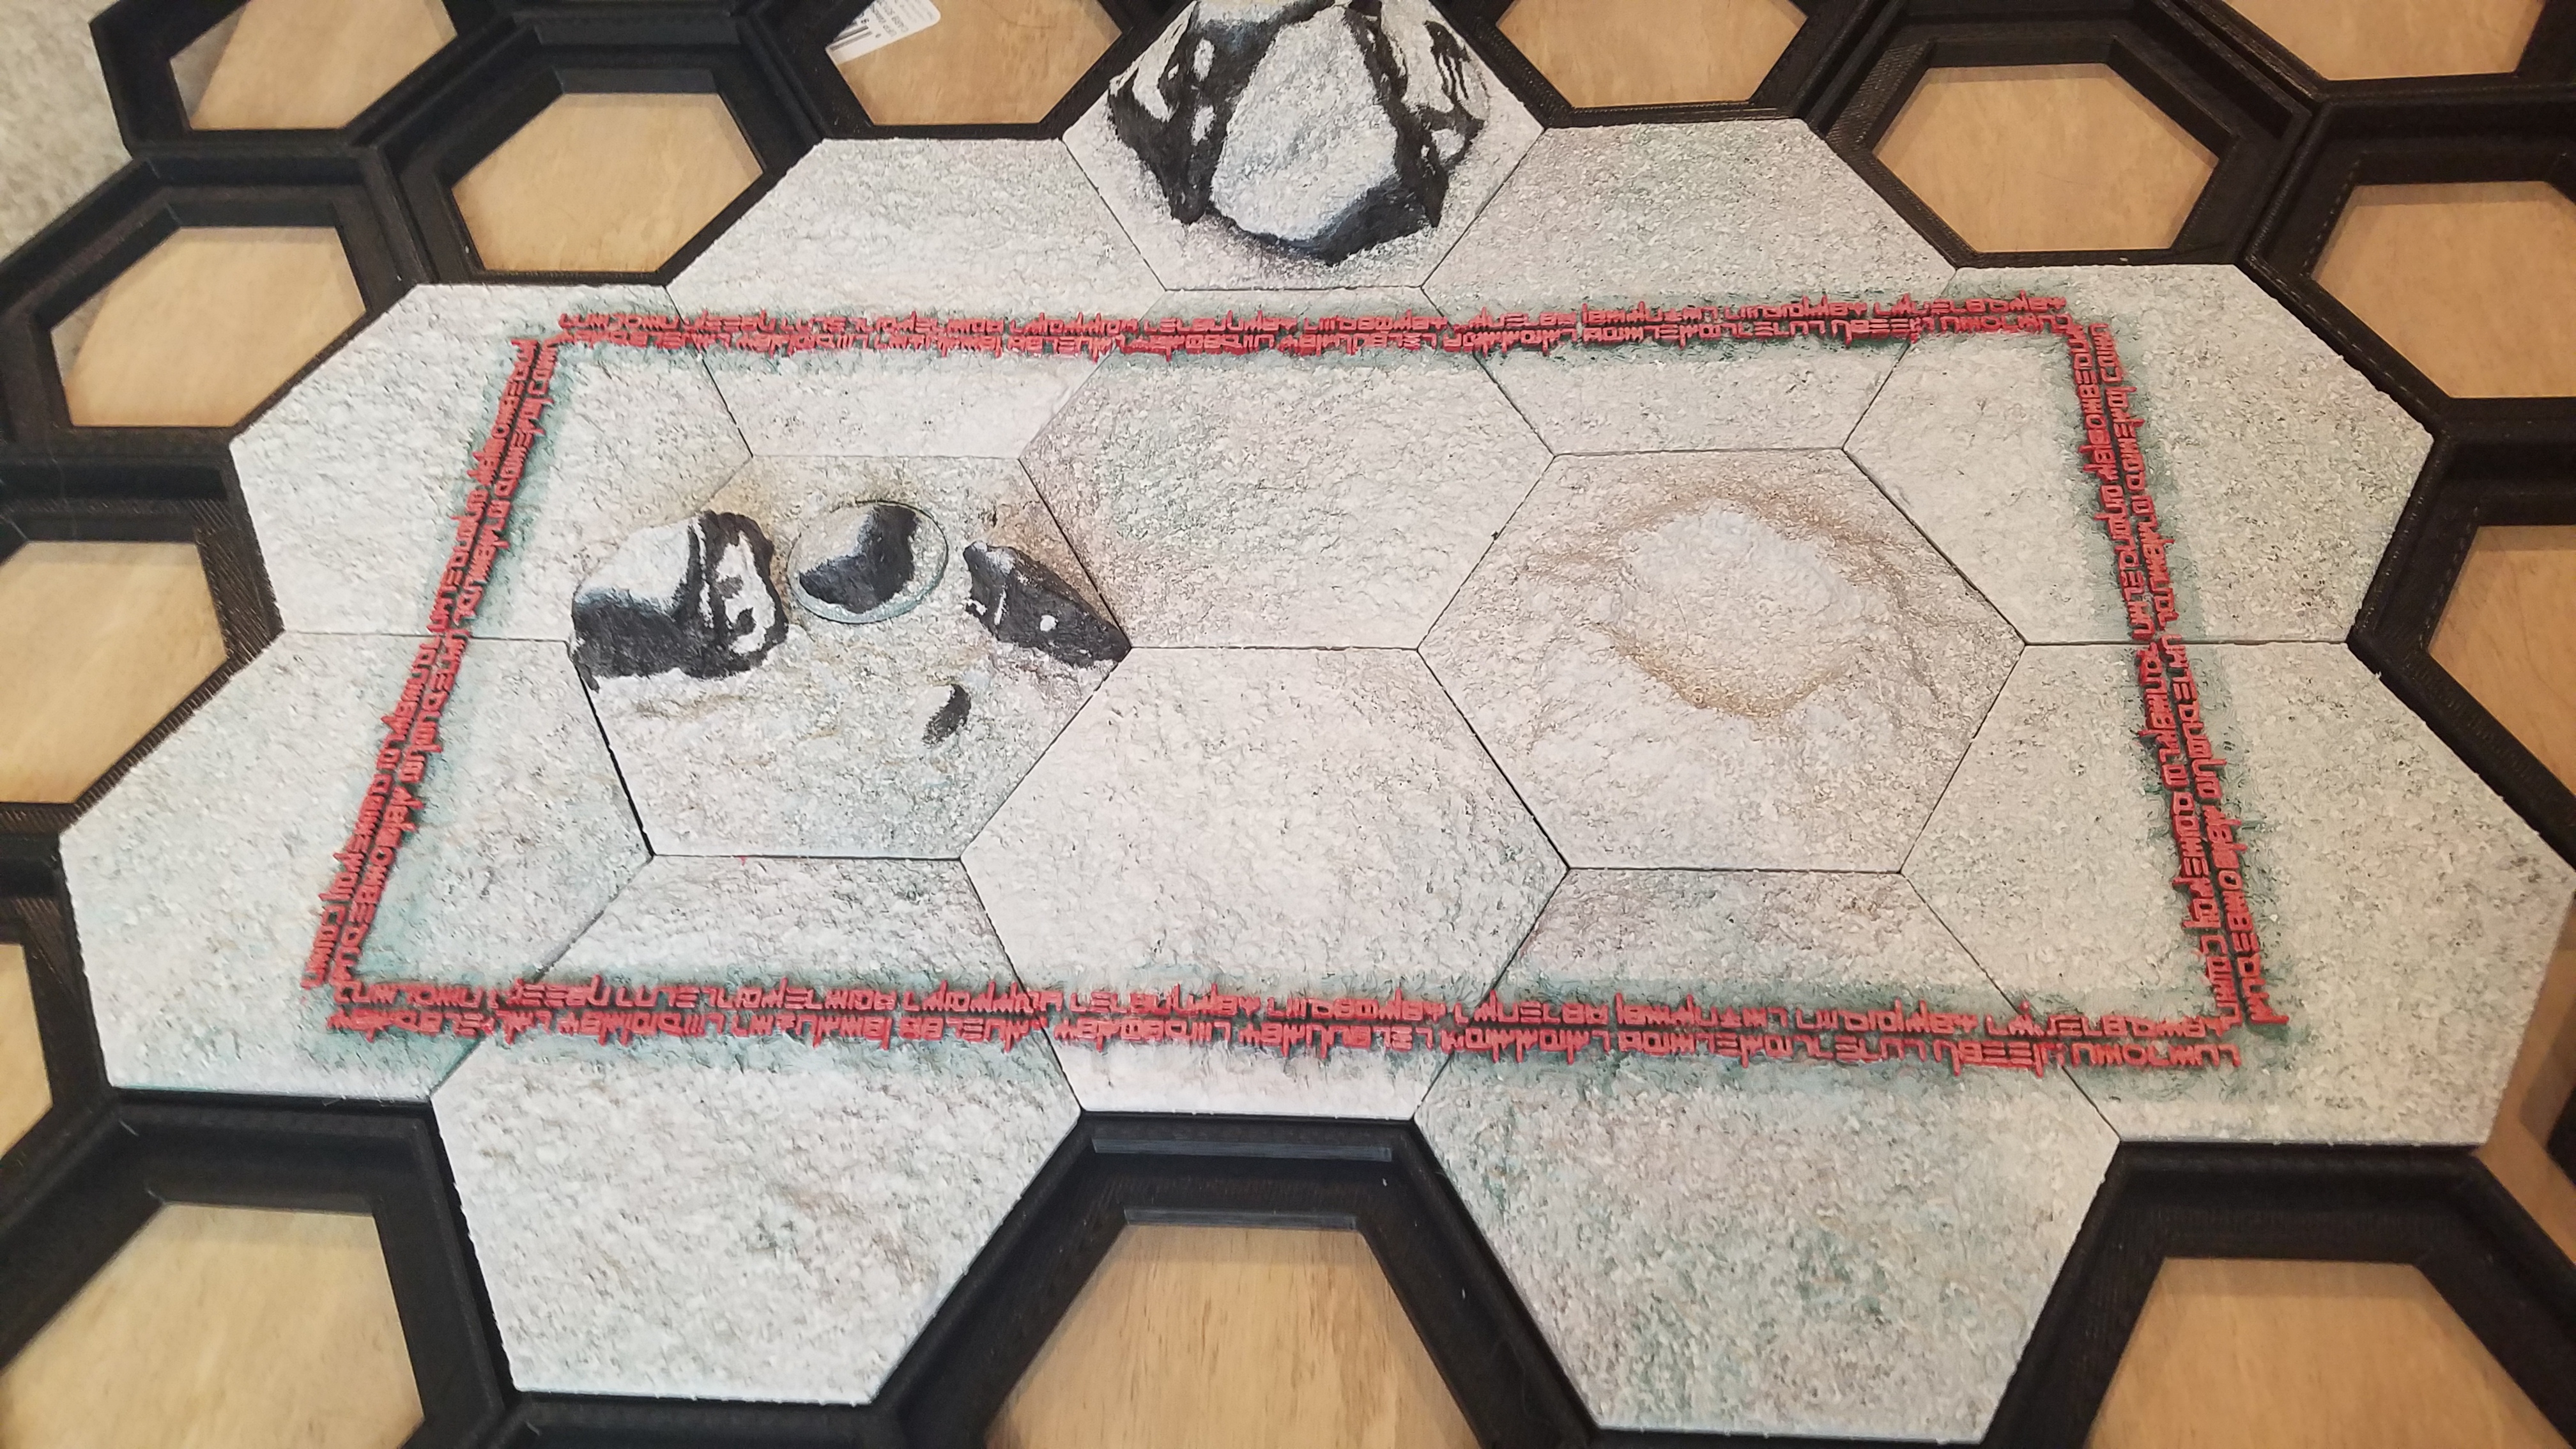
Overall – I’m pretty happy with how it looks. I think the cliff on the back looks a little like vanilla ice cream with chocolate syrup, but, I’m hoping it’ll look better in a full landscape (or will be a fun in-joke on my table at the very least). I’m planning on doing some contrast on the crater, but I haven’t figured out just what yet.
Thanks for hanging in there – I hope you liked the pictures!